


If you are experiencing agonizingly slow internet speeds despite paying for a high-speed connection or owning an expensive router, you are not alone.
Many online forums suggest disabling router features like QoS (Quality of Service) or turning off smart settings. Disabling features you paid extra for isn’t a proper solution. In most cases, the real culprit isn’t your router’s performance or its advanced settings—it is wireless signal interference from nearby networks and devices.
Here is a straightforward, step-by-step guide to fixing your Wi-Fi speed issues without crippling your router’s features.
The Culprit: Channel Congestion
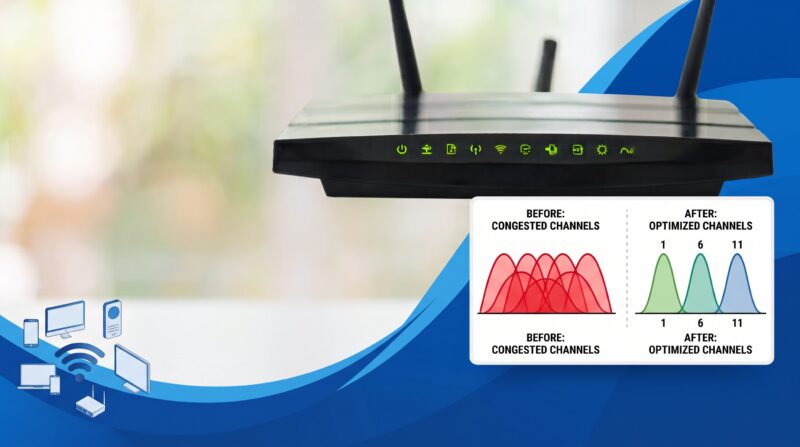
When multiple Wi-Fi routers operate on the same channel, their signals overlap and compete for bandwidth. Most routers come set to “Auto” channel selection out of the box. If you have multiple access points in your home—or live close to neighbors—routers often end up default-assigned to the exact same frequency channel, causing severe interference and speed drops [01:08].
By manually assigning non-overlapping channels to each router or access point in your area, you eliminate this congestion instantly.
Step-by-Step Solution
1. Download a Wi-Fi Analyzer Tool
To figure out which channel is least congested, download a free app like Wi-Fi Analyzer (available on Windows, Android, and other platforms) [02:02].
This tool scans surrounding networks and visually displays:
- Nearby Wi-Fi networks and their signal strength.
- The specific channels those networks are currently using.
- Overlapping signals that are causing interference.
2. Identify Clear Channels
Open the app and check the graph for your frequency band (typically 2.4 GHz or 5 GHz). Look for channels that have little to no network activity.
For instance, if you have multiple routers or extenders:
- Router A (e.g., Tenda): Set to Channel 1
- Router B (e.g., ASUS): Set to Channel 9
- Router C (e.g., ISP Modem/Gateway): Set to Channel 13
Spacing out your devices across the channel spectrum keeps them from stepping on each other’s signals [02:20].
3. Log Into Your Router’s Admin Portal
- Open your web browser and enter your router’s IP address (e.g.,
192.168.1.1or192.168.0.1, depending on your model) [01:24]. - Enter your admin credentials to log in.
4. Update Your Wireless Settings
- Navigate to the Wireless settings section in your router’s dashboard [01:38].
- Locate the Control Channel (or Channel) setting [01:46].
- Switch the channel selection from Auto to the specific unused channel you identified earlier (e.g., Channel 9) [01:46].
- Apply or Save your settings. Your router will reboot its wireless radio briefly to apply the change.
Results & Verification
Once you update your channels, run a speed test at Speedtest.net or Fast.com. You should notice an immediate stabilization in both your download and upload speeds, along with lower latency [02:45].
This simple tweak resolves interference at the hardware signal level across any brand—ASUS, TP-Link, Tenda, Netgear, or standard ISP modems—allowing you to enjoy the full speeds you pay for without sacrificing router functionality.